Aster Flowers: How to Grow and Care for Asters
Aster Flower Care
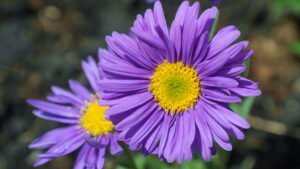
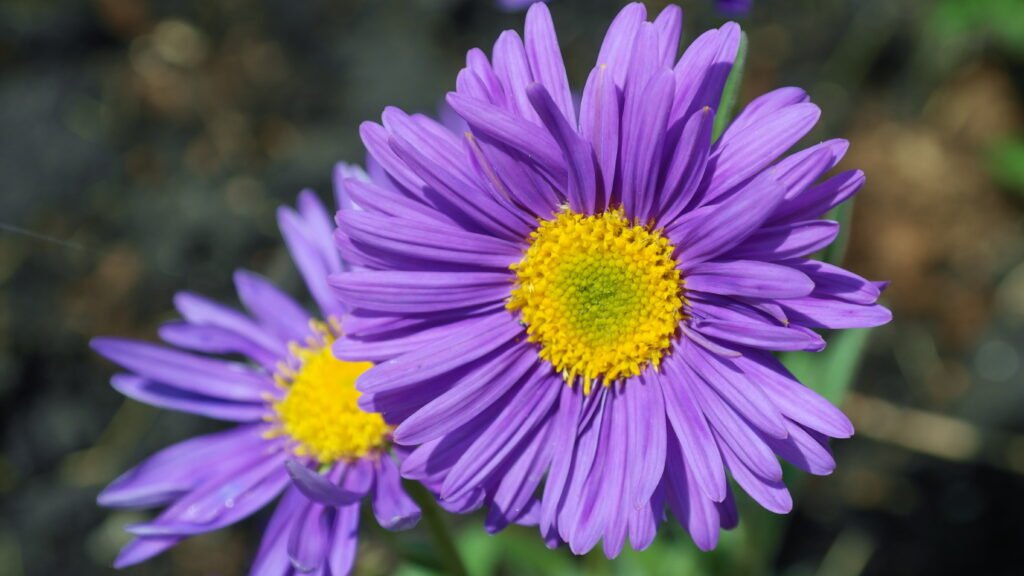
Aster flowers, belonging to the Asteraceae family, are celebrated for their vibrant colors and star-shaped blooms. Botanically classified under the genus Aster, these flowers are native to North America and Eurasia, making them a versatile choice for various climates. There are over 170 species within the Aster genus, showcasing a myriad of colors ranging from purple, blue, and pink to white and red, each adding a splash of color to gardens. This article explains in detail how to grow and care for aster flowers.
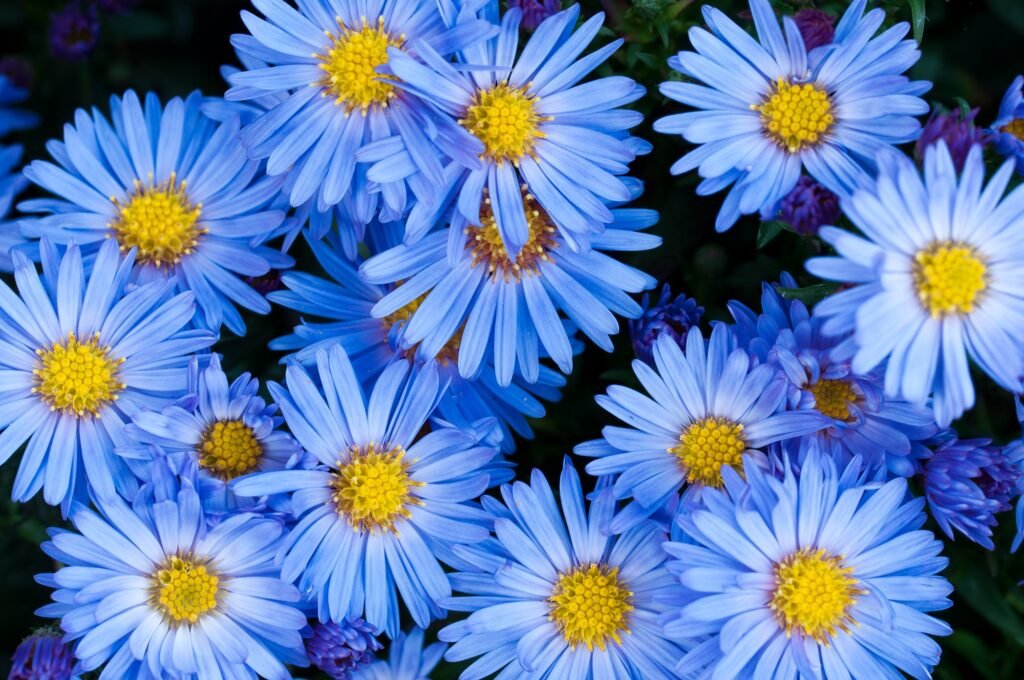
The unique characteristics of aster flowers, such as their daisy-like appearance and diverse color palette, make them a beloved choice for home gardens. Their ability to attract pollinators like bees and butterflies further enhances their appeal. Whether used in borders, containers, or as cut flowers, asters undoubtedly bring a touch of elegance and vibrancy to any garden setting.
Facts About Aster Flowers
History
Historically, Aster flowers have held significant cultural and symbolic meanings. In ancient times, the Greeks believed that Asters were created from the tears of the goddess Astraea, symbolizing love and patience. During the Victorian era, Asters were often used to convey sentiments of daintiness and elegance. In other cultures, these flowers have been associated with various myths and legends, often representing themes of wisdom, valor, and fidelity.
In Europe, aster flowers were initially found in the wild, flourishing in meadows and along forest edges. Historical records indicate that these flowers were cherished by the Greeks and Romans, who admired their beauty and incorporated them into ceremonies and festivals. Similarly, in Asia, particularly in regions of China and Japan, asters were cultivated for their ornamental value and used in traditional medicinal practices. Native American tribes in North America also recognized the value of aster flowers, utilizing them in various remedies and as part of their spiritual rituals.
The practice of cultivating asters for ornamental gardening can be traced back to ancient civilizations. These early horticulturists recognized the aesthetic potential of asters and began to selectively breed them for diverse colors and shapes. One of the key figures in the history of aster cultivation was Theophrastus, an ancient Greek philosopher and botanist, who documented the characteristics of various aster species. His work laid the groundwork for future botanical studies.
During the Renaissance, a renewed interest in botany led to more systematic classification and cultivation of aster flowers. Botanists such as Carolus Linnaeus played a crucial role in this period, developing a standardized taxonomy that included the aster genus. This era also saw the expansion of aster cultivation into ornamental gardens across Europe, driven by the flower’s enduring appeal.
Plant Facts
Common Names: Michaelmas Daisy, Frost Flower, Starwort, New England Aster, Shion (Japan), Zi Ju (China), and Herbstastern (Germany).
Sunlight: Asters flourish in full sun, which equates to at least six hours of direct sunlight per day.
Hardiness Zones: Aster flowers generally thrive in USDA hardiness zones 3 through 8. These zones encompass a wide range of climatic conditions, allowing asters to flourish in various environments.
Spread & Height: Typically, the spread of aster flowers varies between 12 to 36 inches. Aster species can vary from compact dwarf varieties, which grow to about 1 foot tall, to taller varieties that can reach up to 6 feet in height.
Flowering Time: Aster flowers bloom from late summer to early autumn, but this can vary based on local climate variations.
Toxicity: Several studies have scrutinized the toxicity levels of aster flowers, and the consensus is that they do not contain harmful compounds that would pose a threat upon ingestion. For instance, the American Society for the Prevention of Cruelty to Animals (ASPCA) lists asters as non-toxic to pets, including cats and dogs.
Annual/Perennial: Aster flowers are perennials celebrated not only for their aesthetic appeal but also for their resilience and versatility.
Choosing the Right Aster Varieties
When selecting the appropriate aster varieties for your garden, it is essential to consider both the specific needs of the plants and the climate in which they will be grown. Asters come in various types, each with distinct characteristics that cater to different gardening preferences and environmental conditions. Among the most popular varieties are New England asters, New York asters, and alpine asters, each offering unique aesthetic and horticultural benefits.
New England asters (Symphyotrichum novae-angliae) are renowned for their robust growth and vibrant fall blooms. These asters can reach heights of up to six feet and thrive in full sun and well-drained soil. They are particularly well-suited to colder climates, where their late-season blossoms provide a burst of color as other plants begin to fade.
New York asters (Symphyotrichum novi-belgii), also known as Michaelmas daisies, are another excellent choice for gardeners. These asters typically bloom from late summer to early fall, offering a variety of colors ranging from deep purples to soft pinks and whites. New York asters are more compact than New England asters, usually growing to about three feet in height. They prefer full sun but can tolerate partial shade, making them versatile for different garden settings.
For those in alpine or rock garden settings, alpine asters (Aster alpinus) are an ideal choice. These low-growing perennials produce charming, daisy-like flowers in early summer. They are well adapted to cooler climates and can withstand harsh conditions, making them perfect for high-altitude or rocky environments. Alpine asters require well-drained soil and full sun to thrive.
When choosing aster varieties, consider factors such as bloom time, color, and size to create a harmonious and visually appealing garden. Additionally, ensure that the chosen varieties are compatible with your local climate and soil conditions to promote healthy growth and flowering. By carefully selecting the right aster varieties, you can enjoy a diverse and vibrant display of these beautiful flowers throughout the growing season.
How To Plant Aster Flowers
Asters are best planted in the spring after the last frost date. This timing ensures that the young plants are not subjected to freezing temperatures, which can be detrimental to their development. Monitoring local frost dates is crucial, as planting too early can lead to frost damage, while planting too late can shorten the growing season, reducing the overall flowering period.
Planting aster flowers involves a series of essential steps to ensure their successful growth and vibrant blooms. To begin, seed selection is crucial; choose high-quality seeds from a reputable supplier to guarantee healthy plants. Once you have your seeds, the germination process is the next step.
Start by sowing the seeds indoors approximately 6-8 weeks before the last expected frost. Fill seed trays with a well-draining seed-starting mix and plant the seeds about 1/8 inch deep. Lightly water the soil to keep it consistently moist but not waterlogged. Place the trays in a warm spot with indirect sunlight, maintaining a temperature of around 70°F. Within 7-10 days, you should observe germination.
When the seedlings develop their first set of true leaves, it’s time to thin them out, ensuring the strongest plants have enough space to grow. Before transplanting the aster flower seedlings into your garden, harden them off by gradually exposing them to outdoor conditions over a week. This step is essential to reduce transplant shock.
Choose a sunny or partially shaded location with well-draining soil enriched with organic matter. Plant the seedlings 12-18 inches apart, allowing adequate room for growth and airflow. Dig holes slightly larger than the root ball of each seedling, positioning them at the same depth they were in the seed trays. Gently firm the soil around the roots and water thoroughly to settle the soil.
Initial watering is critical; keep the soil consistently moist but avoid overwatering, which can lead to root rot. Mulching around the base of the plants can help retain soil moisture and suppress weeds. As the plants establish, regular watering and occasional feeding with a balanced fertilizer will support their development.
How To Care For Aster Flowers
Soil
Asters thrive in conditions that closely mimic their natural habitats. Ensuring optimal growing conditions is crucial for vibrant blooms and healthy plants. The first consideration is the type of soil. Asters prefer well-draining soil with a loamy or sandy texture. This allows for adequate root development and prevents waterlogging, which can lead to root rot. Amending the soil with compost or organic matter can enhance its structure and nutrient content, creating a more hospitable environment for these flowers.
The pH level of the soil is another critical factor. Asters flourish in slightly acidic to neutral soil, with a pH range of 5.8 to 7.0. Testing the soil pH before planting and making necessary adjustments can significantly impact the health and vigor of the plants. Lime can be added to raise the pH if the soil is too acidic, and sulfur can be used to lower the pH if the soil is too alkaline.
Sunlight
Sunlight is essential for the optimal growth of aster flowers. They require full sun to partial shade, with at least six hours of direct sunlight daily. In regions with extremely hot climates, providing some afternoon shade can protect the plants from scorching and help maintain their vibrant colors.
Spacing
Proper spacing is also vital to ensure adequate air circulation, which can prevent fungal diseases. As a general guideline, space the plants about 1 to 3 feet apart, depending on the variety. This spacing allows for sufficient room for growth and reduces competition for nutrients and water.
Watering
Aster flowers require consistent moisture, but they do not thrive in excessively wet conditions. It is essential to water asters deeply and infrequently, allowing the soil to dry out slightly between watering sessions. This practice helps to avoid root rot, a common problem caused by overly saturated soil.
When watering asters, aim to water at the base of the plants rather than from overhead. This method reduces the risk of fungal infections on the foliage. Early morning watering is preferable as it allows the plants to absorb moisture throughout the day and the leaves to dry before nightfall. During the hotter months, it may be necessary to increase watering frequency to accommodate the increased evaporation rate.
Fertilizing
Fertilizing asters is equally important to support their growth and flowering. A balanced, slow-release fertilizer with an N-P-K ratio of 10-10-10 or 5-10-5 is ideal for asters. Begin fertilizing in early spring when new growth emerges, and continue feeding every 4-6 weeks throughout the growing season.
Organic options such as compost or well-rotted manure can also be beneficial. These not only provide essential nutrients but also improve soil structure and moisture retention. Applying a thin layer of compost around the base of the plants in spring and fall can offer a steady supply of nutrients. Additionally, a mulch layer helps to conserve moisture and suppress weeds, further aiding in the care for aster flowers.
Pruning and Deadheading
Pruning and deadheading are essential practices for maintaining the health and vibrancy of aster flowers. Proper pruning techniques not only promote continuous blooming but also ensure that the plant remains robust and aesthetically pleasing. By understanding the appropriate times and methods for these tasks, gardeners can maximize the beauty and longevity of their aster plants.
Pruning asters involves selectively trimming parts of the plant to encourage bushier growth and prevent legginess. The best time to prune is in early spring, just as new growth begins to emerge. At this stage, cutting back the stems to about six inches above the ground helps to stimulate new, healthy shoots. This early intervention allows the plant to develop a dense structure, which supports more abundant flowering later in the season.
As the growing season progresses, it is important to continue monitoring the asters for any signs of overgrowth or spent blooms. Deadheading, the practice of removing faded or dead flowers, plays a crucial role in encouraging continuous blooming. By cutting off spent flowers just above the nearest leaf node, gardeners can redirect the plant’s energy into producing new blooms rather than seed formation. This process not only extends the flowering period but also enhances the overall appearance of the plant.
The benefits of regular pruning and deadheading extend beyond aesthetics. These practices help to maintain plant health by improving air circulation and reducing the risk of disease. Removing dead or damaged parts of the plant prevents the spread of fungal infections and pests, ensuring that aster flowers remain vibrant and healthy throughout the growing season.
Pest and Disease Management
Aster flowers, known for their vibrant blooms, can unfortunately fall prey to various pests and diseases. Effective management begins with recognizing and understanding the common threats to these beautiful plants. Among the most prevalent pests are aphids, spider mites, and leafhoppers. Aphids, tiny sap-sucking insects, can cause significant damage by weakening the plant and spreading diseases. Spider mites, although minuscule, can lead to severe leaf damage and stunted growth, while leafhoppers can transmit aster yellows, a serious disease that causes yellowing and distortion of the foliage.
To combat these pests, regular monitoring and early detection are crucial. Introducing beneficial insects like ladybugs and lacewings can naturally reduce aphid populations. For spider mites, a strong jet of water can dislodge them from the plants, while neem oil or insecticidal soap can be effective against both spider mites and aphids. For leafhoppers, floating row covers can prevent these insects from reaching the asters.
In terms of diseases, powdery mildew and rust are common issues affecting asters. Powdery mildew appears as a white, powdery substance on leaves and stems, thriving in warm, dry conditions. Rust, on the other hand, manifests as orange or reddish pustules on the undersides of leaves. Both diseases can weaken aster plants and reduce their aesthetic appeal. To prevent these fungal diseases, ensure proper air circulation by spacing plants adequately and avoiding overhead watering. Fungicides can be applied as a preventive measure or at the first sign of infection.
Overwintering
As the fall season approaches, it’s crucial to prepare asters for the colder months. One effective method is mulching, which helps insulate the roots and maintain soil temperature. A layer of organic mulch, such as straw or shredded leaves, applied around the base of the plants can provide the necessary protection against frost.
Cutting back the plants is another essential step in winterizing asters. After the first hard frost, trim the stems down to about 3-4 inches above the ground. This not only tidies up the garden but also prevents potential disease and pest issues. It’s important to remove and dispose of any diseased plant material to avoid contamination in the following growing season.
Protecting asters from harsh weather conditions is paramount. In regions with severe winters, consider covering the plants with burlap or frost cloth to shield them from extreme temperatures and drying winds. This extra layer of protection can make a significant difference in the survival rate of your aster flowers.
Division
Dividing aster flowers is a crucial practice for ensuring their health and vigor. Divide aster plants every 2–3 years when they become overcrowded. The optimal time for dividing asters is early spring. This time is ideal due to the moderate temperatures and increased moisture levels, which facilitate quicker recovery and root establishment.
Several signs indicate that asters need to be divided. Overcrowding is a primary indicator; when clumps of asters become too dense, they compete for nutrients and space, leading to diminished growth and flowering. Reduced flowering is another sign that division is necessary. If asters produce fewer blooms than usual, it may be due to overcrowding or age. Additionally, the appearance of dead centers in clumps is a clear signal that division is overdue. This phenomenon occurs when the older, central parts of the plant lose vitality, while the outer edges continue to grow.
Carefully dig around the base of the aster clump, maintaining a radius of about 6-8 inches from the plant’s base to avoid damaging the roots. Gently lift the clump out of the ground, keeping as much soil around the roots as possible. Shake off excess soil to expose the root system.
Examine the root ball and identify natural divisions within the clump. Using your hands or a clean, sharp knife, gently separate the clumps. Each division should have several healthy shoots and a substantial portion of the root system. Ensure that the roots are handled carefully to minimize damage.
Choose new planting sites that receive full sun to partial shade. Dig holes large enough to accommodate the root systems of the new divisions. Place each division into its hole, ensuring that the crown of the plant is at ground level. Fill the hole with soil, firming it gently around the roots to eliminate air pockets.
To aid in establishment, properly water the recently planted divisions. Monitor the plants regularly, ensuring they receive adequate water, especially during dry periods.

