How To Grow And Care For Hosta Plants

Hosta Plants
Hostas, also known as plantain lilies, are herbaceous perennial plants that are native to Asia. They are highly valued for their attractive foliage, which comes in a wide range of colors, shapes, and sizes. From small, compact varieties to large, sprawling ones, there is a hosta plant for every garden and landscape. This article explains in detail how to grow and care for hosta plants.
One of the reasons why hostas are so popular among gardeners is their ability to thrive in a variety of growing conditions. They can tolerate both full sun and shade, although most varieties prefer partial shade to full shade. This makes them an excellent choice for gardens with different light conditions.
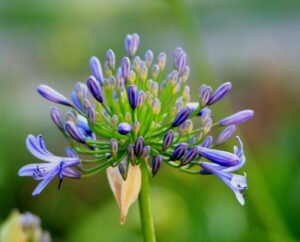
In addition to their beauty and adaptability, hostas are also known for their ability to attract pollinators to the garden. Their flowers, which bloom in early to mid-summer, are highly attractive to bees and butterflies. This makes them a great choice for gardeners who want to create a pollinator-friendly garden.
How To Care For Hosta Plants
Choosing the Right Location
Hostas thrive in shady areas, making them a popular choice for gardens with limited sunlight. When choosing a location for your hostas, look for an area that receives dappled or filtered sunlight. Avoid planting them in direct sunlight, as this can scorch their leaves.
Additionally, hostas prefer moist, well-drained soil. If your soil is heavy and clay-like, consider amending it with organic matter such as compost or peat moss to improve drainage.
It is also important to consider the overall environment of the chosen location. Hostas are generally hardy plants, but they may have difficulty surviving in extreme climates. If you live in an area with harsh winters or scorching summers, it is advisable to choose a location that offers some protection. Planting them near a wall or under the canopy of a tree can provide some shelter from the elements.
Furthermore, the size of the hosta plant should also be taken into account when selecting a location. Some hosta varieties can grow quite large, with leaves spanning several feet in diameter. These larger varieties may overpower smaller garden beds or crowd out other plants. It is important to choose a location that allows the hostas to grow to their full potential without encroaching on other plants or structures.
Lastly, consider the overall aesthetic of your garden when choosing a location for your hostas. Hostas come in a variety of colors, shapes, and sizes, so it is important to choose a location that complements their unique characteristics. For example, if you have a garden with predominantly green foliage, you may want to choose hosta varieties with variegated leaves to add visual interest.
By carefully considering these factors and selecting the right location, you can ensure that your hostas will thrive and enhance the beauty of your garden for years to come.
Planting Hostas
Now that you have found the perfect location for your hostas, it’s time to plant them. Follow these steps for successful planting:
- Prepare the soil: Dig a hole that is slightly larger than the root ball of your hosta plant. To promote root growth, loosen the soil at the hole’s bottom.
- Place the hosta: Gently place the hosta plant in the hole, ensuring that the top of the root ball is level with the surrounding soil.
- Backfill the hole: Fill the hole with soil, gently firming it around the roots of the plant. Compacting the soil too much can impede the growth of roots.
- Water thoroughly: After planting, water the hosta plant thoroughly to settle the soil and remove any air pockets.
- Mulch the area: Once the hosta is planted and watered, apply a layer of mulch around the base of the plant. This will help to retain moisture in the soil, suppress weed growth, and regulate soil temperature.
- Provide regular watering: Hostas thrive in moist soil, so it is important to water them regularly, especially during dry periods. Try to maintain a constant moisture content in the soil without making it too wet.
- Fertilize as needed: Hostas benefit from regular fertilization to promote healthy growth and vibrant foliage. Use a slow-release fertilizer that is balanced and follows the directions on the container.
- Monitor for pests and diseases: Keep an eye out for common hosta pests such as slugs, snails, and deer. If necessary, take appropriate measures to control these pests and prevent damage to your plants.
- Divide and transplant: Over time, hostas can become overcrowded and may need to be divided and transplanted. When the plants are dormant, which is usually in the early spring or fall, this is done. Dig up the clump, separate the individual plants, and replant them in new locations following the same planting steps.
Watering and Mulching
Proper watering is essential for the health and growth of hostas. Here are some tips to keep in mind:
- Consistent moisture: Hostas prefer consistently moist soil. Water them regularly, especially during dry periods, to keep the soil evenly moist. This is particularly important during the summer months when the heat can quickly dry out the soil. A good rule of thumb is to provide about 1 inch of water per week, either through rainfall or supplemental watering.
- Avoid overwatering: While hostas like moist soil, they don’t tolerate standing water. Make sure the soil is well-drained and avoid overwatering, as this can lead to root rot. To test the soil’s moisture level, stick your finger about an inch into the soil. If it feels dry, it’s time to water. If it feels moist, hold off on watering for a few more days.
- Mulch: Cover the base of the hosta plant with a layer of organic mulch, such as compost or crushed bark. Mulch helps regulate moisture retention, weed suppression, and soil temperature. It also adds a neat and finished look to the garden bed. When applying mulch, be sure to leave a small gap around the stem of the hosta to prevent rotting. Aim for a mulch depth of about 2-3 inches, making sure not to pile it up against the stem.
- Choosing the right mulch: When selecting mulch for hostas, opt for organic materials that will break down over time and enrich the soil. Shredded bark, wood chips, or compost are all excellent choices. Avoid using mulch that is too fine, as it can become compacted and hinder water penetration. Additionally, avoid using mulch that is high in acidity, such as pine needles, as hostas prefer a slightly acidic to neutral pH.
By following these watering and mulching practices, you can ensure that your hostas thrive and provide a beautiful display in your garden. Remember to monitor the moisture levels regularly and adjust your watering schedule accordingly. With proper care, your hostas will reward you with lush foliage and vibrant blooms year after year.
Fertilizing Hosta Plants
Fertilizing hostas is important to ensure they receive the nutrients they need for healthy growth and vibrant foliage. Here are some guidelines for fertilizing hostas:
- Timing: Apply a balanced slow-release fertilizer in early spring, just as the hostas begin to emerge from the ground. This will provide them with nutrients throughout the growing season.
- Amount: Follow the instructions on the fertilizer packaging for the recommended amount. Avoid over-fertilizing, as this can burn the roots of the plant.
- Additional feedings: If your hostas show signs of nutrient deficiency, such as yellowing leaves, you can apply a liquid fertilizer during the growing season. Be sure to follow the manufacturer’s instructions.
Aside from timing and amount, it is also important to consider the type of fertilizer you use for hostas. Hostas are known to prefer a slightly acidic soil pH, so it is recommended to choose a fertilizer that is specifically formulated for acid-loving plants. These types of fertilizers typically contain higher levels of nitrogen, which promotes leafy growth, and lower levels of phosphorus and potassium.
When applying the fertilizer, it is best to spread it evenly around the base of the hosta plants, avoiding direct contact with the foliage. This will prevent any potential burning or damage to the leaves. Gently work the fertilizer into the soil using a rake or garden fork, being careful not to disturb the roots too much.
In addition to regular fertilization, hostas also benefit from organic matter, such as compost or well-rotted manure, added to the soil. This helps improve soil structure, drainage, and nutrient retention, providing a healthier growing environment for the hostas.
It is important to note that while fertilizing is beneficial for hostas, it is equally important not to overdo it. Excessive fertilization can lead to an overgrowth of foliage, making the plants more susceptible to diseases and pests. It is always best to follow the recommended guidelines and monitor the health of the hostas to ensure they are receiving the appropriate amount of nutrients.
Pest and Disease Control
While hostas are generally hardy plants, they can be susceptible to certain pests and diseases. Here are some common issues to watch out for:
- Slugs and snails: These pests can cause significant damage to hostas by feeding on their leaves. Use organic slug and snail control methods, such as beer traps or copper tape, to protect your plants. Beer traps work by placing shallow containers filled with beer near your hostas. Slugs and snails are attracted to the beer, crawl into the container, and drown. Copper tape can be placed around the base of the plants, creating a barrier that slugs and snails are reluctant to cross.
- Deer and rabbits: Hostas are a favorite food of deer and rabbits. If you have a problem with these animals in your garden, consider using fencing or repellents to keep them away from your hostas. Fencing can be an effective way to physically prevent deer and rabbits from accessing your plants. Repellents, such as sprays or granules, can be applied to the foliage of the hostas to deter these animals from feeding on them.
- Fungal diseases: Hostas can be susceptible to fungal diseases such as leaf spot and crown rot. Leaf spot is characterized by dark, irregular spots on the leaves, while crown rot affects the base of the plant, causing it to rot and eventually die. Avoid watering plants from above and make sure there is adequate air circulation around the plants to prevent these illnesses. Overhead watering can create a moist environment that is conducive to fungal growth. Instead, water hostas at the base, directing the water to the soil rather than the leaves. Additionally, spacing hostas properly and removing any dead or diseased foliage can help improve air circulation and reduce the risk of fungal diseases.
In addition to these common issues, hostas may also be susceptible to other pests such as aphids, slugs, and nematodes. Small insects called aphids cause stunted development and deformed leaves by feeding on the sap of plants. They can be controlled with insecticidal soap or neem oil. Slugs and nematodes can also be problematic, causing damage to the roots and leaves of the hostas. Nematodes are microscopic worms that live in the soil and can be difficult to control. To prevent nematode infestation, avoid planting hostas in the same location year after year and practice good sanitation by removing any affected plants or debris from the garden.
By being proactive and implementing these pest and disease control measures, you can ensure that your hostas remain healthy and vibrant throughout the growing season.
How To Grow Hosta Plants
Dividing and Transplanting Hostas
Over time, hostas can become overcrowded and may need to be divided and transplanted. Here’s how to do it:
- Choose the right time: The best time to divide and transplant hostas is in early spring or fall when the weather is cool and the plants are dormant.
- Prepare the new location: Dig a hole in the new location that is large enough to accommodate the divided hosta plant.
- Dig up the hosta: Carefully dig up the entire hosta plant, taking care not to damage the roots.
- Divide the plant: Gently separate the hosta plant into smaller clumps, ensuring that each clump has a healthy root system.
- Transplant: Plant the divided hosta clumps in the prepared hole, making sure they are at the same depth as they were previously planted.
- Water thoroughly: After transplanting, water the hosta plants thoroughly to settle the soil and remove any air pockets.
- Maintain proper care: After dividing and transplanting hostas, it is important to provide them with the proper care to ensure their successful growth and establishment in their new location. This includes regular watering, especially during dry periods, and applying a layer of mulch around the plants to help retain moisture and suppress weed growth.
- Monitor for signs of stress: It is normal for hostas to experience some transplant shock after being divided and transplanted. Keep an eye out for signs of stress, such as wilting or yellowing leaves, and take appropriate action, such as providing additional water or shading the plants from direct sunlight if necessary.
- Dividing and transplanting hostas can be a rewarding process that allows you to rejuvenate your plants and create new additions to your garden. By following these steps and providing proper care, you can ensure the success of your hostas in their new location.